
T1563.001 - Remote Service Session Hijacking: SSH Hijacking
Tactic: Lateral Movementl
Platforms:Linux, macOS
Since its introduction in 1995, SSH (Secure Shell) has enabled secure remote login and the operation of services securely over a network. It runs at the application layer of the OSI model (layer 7). Unlike Telnet and Berkeley’s Remote Shell (rsh), SSH incorporates the use of encryption to hide a transmission’s contents even if observers have access to the data stream.
It was computer scientist Tatu Ylonen who created the first version with subsequent developments in the protocol leading to additional releases.
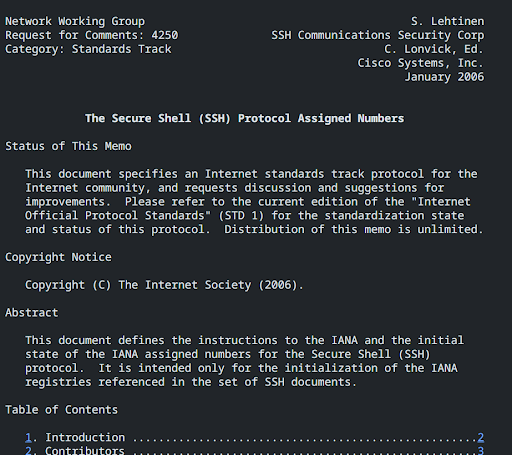
In RFCs (Request for Comments) 4250, 4251, 4252, 4253, 4254 and 4255, there are various conventions and assignments outlined concerning the protocol. These are useful to refer to to understand the protocol at a deeper level.
Overview of the various documents:
- RFC 4250 - The Secure Shell (SSH) Protocol Assigned Numbers
- RFC 4251 - The Secure Shell (SSH) Protocol Architecture
- RFC 4252 - The Secure Shell (SSH) Authentication Protocol
- RFC 4253 - The Secure Shell (SSH) Transport Layer Protocol
- RFC 4254 - The Secure Shell (SSH) Connection Protocol
- RFC 4255 - Using DNS to Securely Publish Secure Shell (SSH) Key Fingerprints
RFC 4251, in particular, is useful in understanding the protocol's security considerations in better detail and covers many aspects to do with transport, authentication, and connection.
Using SSH in Kali:
Since Kali version 2.0, Systemd (the System Management Daemon) has been used in place of the ‘init’ system. Thus, the OpenSSH server should already be installed. To check, use the below command:
$apt list openssh-server
If you find you don’t have the server installed it can be installed with:
$apt install openssh-server
Now if we simply type 'ssh' from the command line, we can see numerous options for usage which can be supplied as further parameters:
Tip: the command ‘
uname -a’ can be used in Linux systems to display all available information about your system.

In the above case, we can see the following just from one command:
- The kernel name = ‘Linux’ [uname -s]
- The domain/network name of the machine = ‘learn2hack’ [uname -n]
- The kernel release = ‘6.6.9-amd64’ [uname -r]
- The kernel version = ‘#1 SMP PREEMPT_DYNAMIC Kali 6.6.9-1kali1 (2024-01-08)’ [uname -v]
- The machine hardware name = ‘x86_64’ [uname -m]
- The OS = ‘GNU/Linux’ [uname -o]
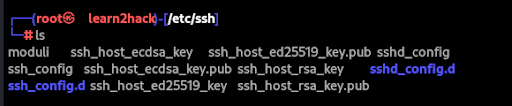
Now, if we head over to /etc/ssh, we will be able to see our stored public and private keys:
$cd /etc/ssh
For extra security, we can back up these original keys with the below steps:
$mkdir default_keys
$mv /etc/ssh/ssh_host_*defualt_keys/


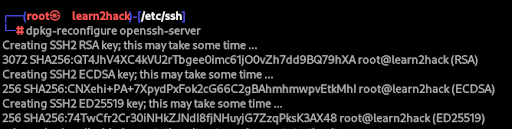
We can then regenerate the keys with the following command:
$dpkg-reconfigure openssh-server
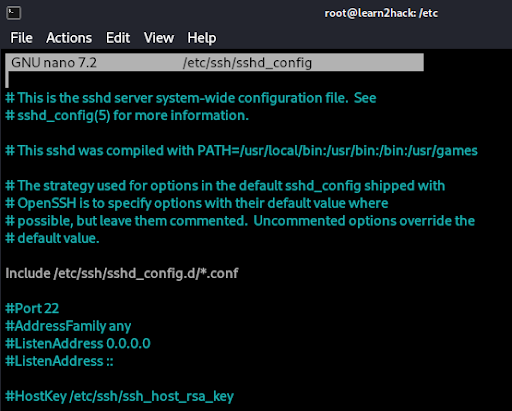
The sshd_config file (within /etc/ssh/) gives us many options for configuring SSH further including authentication, authorization, and Kerberos settings.
Additionally, to check the status of the SSH service, we can use:
$systemctl status ssh.service
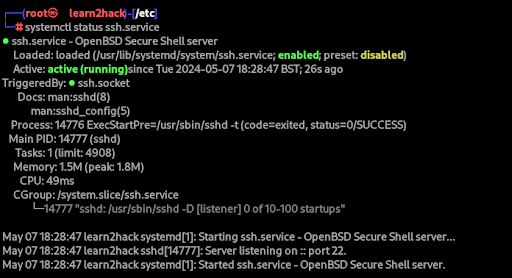
If the service isn’t running, we can enable and start SSH with the following:
$systemctl enable ssh.service
$systemctl start ssh.service
To initiate an SSH connection from one system to another, we should use the below command:
$ssh user@[ip]
For Windows machines, it is important to have the SSH client (for outgoing connections) and server (for incoming connections) installed. For more information see - Microsoft OpenSSH Installation Guide.
Now we understand the basics of using SSH in the terminal. Let's take a closer look at how SSH can be abused by hackers through Remote Service Session Hijacking.
Understanding Remote Service Session SSH Hijacking:
For any remote service, (e.g. RDP, SSH), it is important to be aware that preexisting sessions can be vulnerable to attack, enabling lateral movement in certain environments.
This technique is called ‘Remote Service Session Hijacking’ and it can be carried out without knowing a user’s password due to sessions already being authenticated.
For SSH, the technique can be executed on UNIX-related systems such as Linux and macOS where the protocol is a standard means of remote access.
Due to how popular SSH is for secure management of workstations, we must understand how the attack works so that we can better protect against it.
From the image over the page, we can see that it is the inclusion of the ‘Jump Server’ that ultimately enables possible interception of an SSH connection from the SSH forwarding agent to the client.
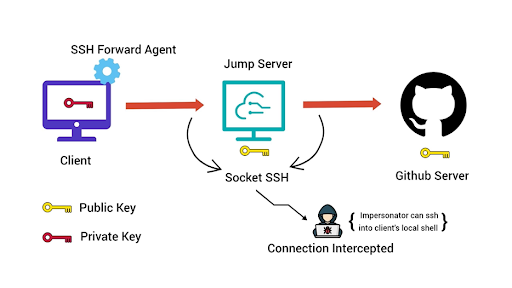
On the first machine, if the forwarding agent is enabled, the SSH-agent daemon is run for the SSH session of the user making the SSH connection.
Then, the private key of the connection is added to the same daemon.
This is what enables a user not to be required to enter a passphrase when logging into the target host from a jump host. They can simply type:
$ssh target_host
Alternatively, if the forwarding agent is disabled, after logging into the jump host with the standard parameters, the private key has to be moved to the jump host and thus a passphrase needs to be provided for the SSH key.
If forwarding is enabled, once the ssh-agent is running, a socket will be created in the /tmp directory and the shell variable SSH_AUTH_SOCK will be exported to provide the private keys stored in memory when needed.
If we head to /tmp, we can see the agent in the relevant ssh folder below:
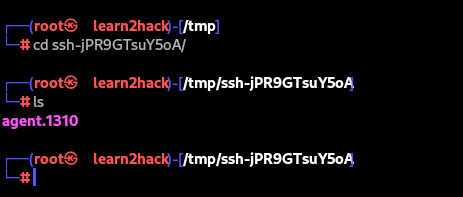
Now, if we can read/write to the socket, any private key stored in the agent can be hijacked. We simply need to ask the agent through the socket or let the ssh client do it for us.
In our case, the command for that would be:
SSH_AUTH_SOCK=/tmp/ssh-jPR9GTsuY5oA/agent.1310 ssh username@target_server
It is key to remember that for the attack to succeed, the attacker needs one of the below:
- to have obtained root privileges in the jump host to read the socket created in /tmp
- ssh session of the victim in the jump host that uses ForwardAgent
- reuse of the credentials in another server
Defensive Measures:
Although SSH is much more secure than unencrypted protocols such as Telnet and FTP, it is still important to look at defensive measures for it due to techniques like SSH Session Hijacking.
In regards to the opening and closing of SSH sessions, it is recommended that implementations disable all potentially dangerous features such as agent forwarding, X11 forwarding and TCP/IP forwarding if the host key has changed without notice or explanation.
Due to the implications of SSH being carried out by root, privileged account management mitigation should also be put into place. E.g. not allowing remote access via SSH as root or other privileged accounts.
To do this for the root account we would need to edit the sshd_config file making sure ‘PermitRootLogin’ is set to ‘no’ #disabled:
/etc/ssh/sshd_config:
    PermitRootLogin no #disabled
After we would simply need to restart the ssh daemon to implement the changes:
/etc/init.d/sshd restart
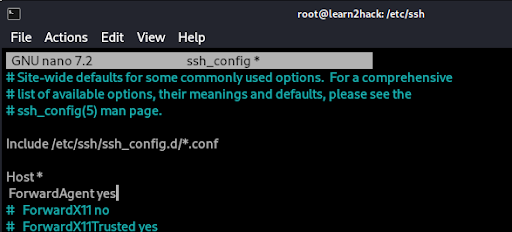
As mentioned, another key hardening measure to implement is to disable ‘ForwardAgent’ from the ssh_config file.
If agent forwarding is enabled, there is a greater risk that an attacker who has bypassed file permissions on the remote host will be able to access the local agent through the forwarded connection.
Below we can see an enabled version which can be altered simply by changing ‘yes’ to ‘no’.
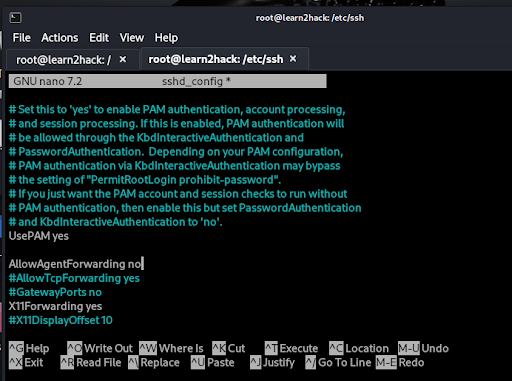
Similarly, we can disable the feature completely on the server by including ‘AllowAgentForwarding no’ in the /etc/ssh/sshd_config file as seen below:
Additional SSH hardening techniques include implementing strong passwords for SSH key pairs, disabling OpenSSH server on endpoints and restricting file and directory permissions to reduce the chance of privilege escalation techniques from occurring.
For further reading on detecting session hijacking see: Detecting Session Hijacking
For more ideas on how to harden against SSH see: Mitigating SSH-based Attacks